If you want to:
- Upload images from the MidJourney Image Splitter to your blog media.
- Upload Images from The Free Image Search to your blog media.
- Be able to insert images from your blog media into your article.
- Or auto publish articles to your blog from SaasEasy AI Blogger
- Or use the Internal Links feature of article generation (still under construction)
you will need to install a plugin that allows authentication to your blog through the WordPress Api using JWT Tokens.
JWT stands for JSON Web Tokens. It’s a more secure mechanism for authentication to your blog than passing your username/password around.
This is the only method of accessing your blog in SaasEasy AI – WE DO NOT STORE YOUR USERNAME OR PASSWORD for security reasons.
The JWT Plugin will allow access to the WordPress REST API through a token. We need this JWT Token access to upload images to your blog, allow you to select images, and find blog posts when building the Internal Linking section for articles and to post articles to your blog.
PREREQUISITE: Make sure your blog has the REST API. It should, out of the box, if you are on WordPress version 4.7 (which is ancient) or later.
You can test this by trying to access a read only API request that doesn’t require authentication, such as listing posts:
PATH_TO_YOUR_BLOG_HOMEPAGE/wp-json/wp/v2/posts
You can paste that in to a browser and see a textual representation of posts. Then do the same with the url for your blog.
Assuming your blog has the REST API (it should if you’re on WordPress 4.7 or later) you can continue to installing the JWT Authentication Plugin.
Installing the JWT Authentication Plugin
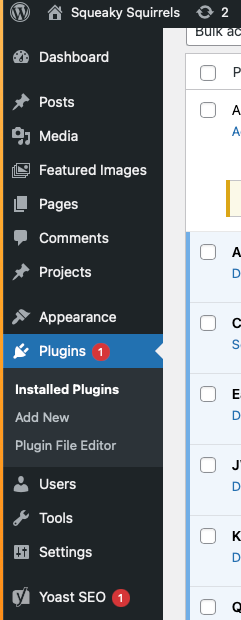
Install the Plugin – From your WordPress Admin Dashboard – click on Plugins in the menu. Then click the “Add New” button.
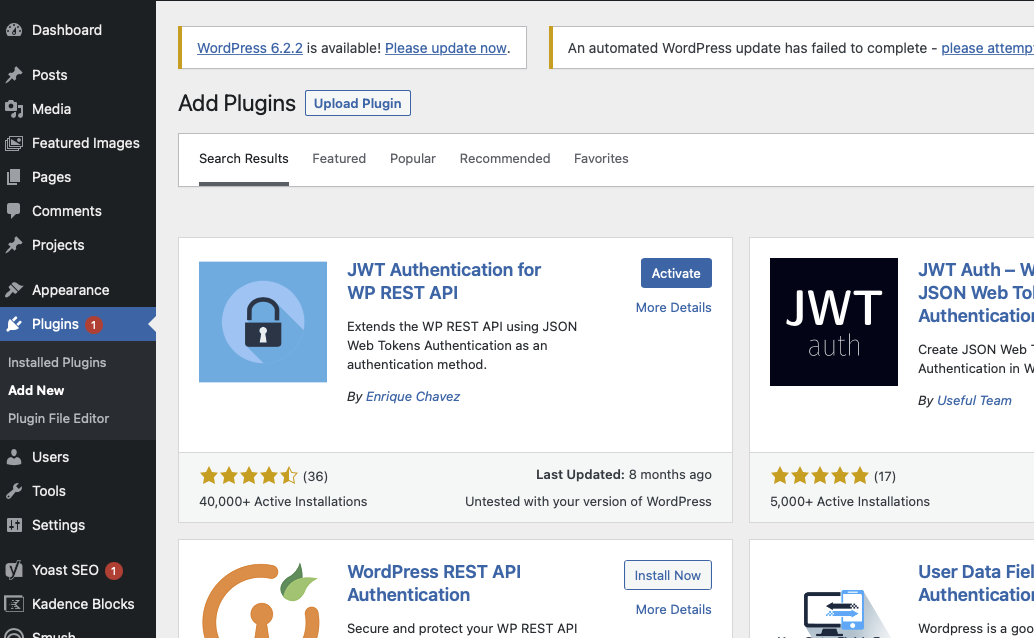
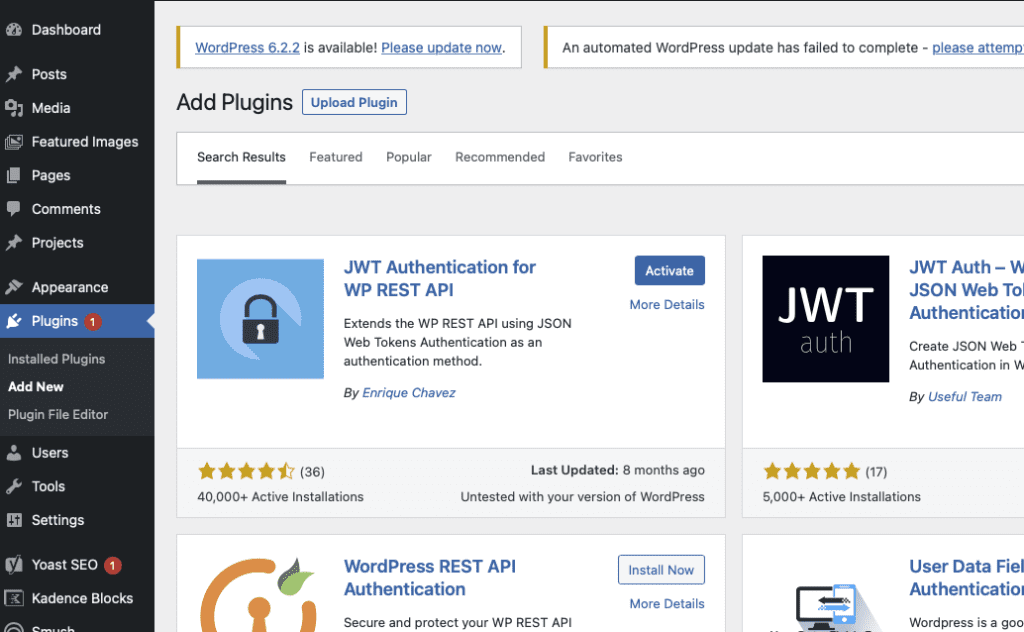
On the next screen type “JWT” into the field next to the “Keyword” dropdown.

The plugin you want to install is shown at the top left in the picture above “JWT Authentication For WP REST API”
Click the “Install Now” button for the plugin “JWT Authentication for WP REST API”
After it installs, you will see the “Activate” button. Click the Activate button.
Configuring your wp-config.php file.
You Definitely Need To Do:
You need to add 2 lines to your wp-config.php file.
One is:
define('JWT_AUTH_SECRET_KEY', 'your-top-secret-key');
You can use a key from here https://api.wordpress.org/secret-key/1.1/salt/ to replace your-top-secret-key
You’ll see something similar to the following when you visit the url on the line above: These values are unique and will change for each person hitting the URL, you just need to copy one of the random unique keys, such as the text highlighted in blue below and replace your-top-secret-key with it.
DO NOT USE ANY VALUE FROM THE EXAMPLE BELOW!! Visit the url above so you get ur own unique key!
define('AUTH_KEY','H]9{:)=g{!gU[S-U+zdGuEyg.+|#t/g6tB@~ZmDrC)DxI4e~T6s;nU5Xjy353F');
................
The 2nd line you need to add to wp-config.php is:
define('JWT_AUTH_CORS_ENABLE', true);Might Need To Do: PHP HTTP Authorization Header enable
Most of the shared hosting has disabled the HTTP Authorization Header by default.
To enable this option you’ll need to edit your .htaccess file adding the follow
RewriteEngine on
RewriteCond %{HTTP:Authorization} ^(.*)
RewriteRule ^(.*) - [E=HTTP_AUTHORIZATION:%1]
Locating/Editing wp-config.php
Here is a Hostinger hosting article that might help you locate and edit your wp-config.php file. (Covers finding wp-config.php file through CPanel or Ftp).
https://www.hostinger.com/tutorials/wp-config-php
If not, try searching google for: NAME_OF_YOUR_HOSTING edit wp-config.php or contact your hosting provider and ask them how you can edit the file.
Authenticate And Set JWT Token In SaasEasy AI Blogger
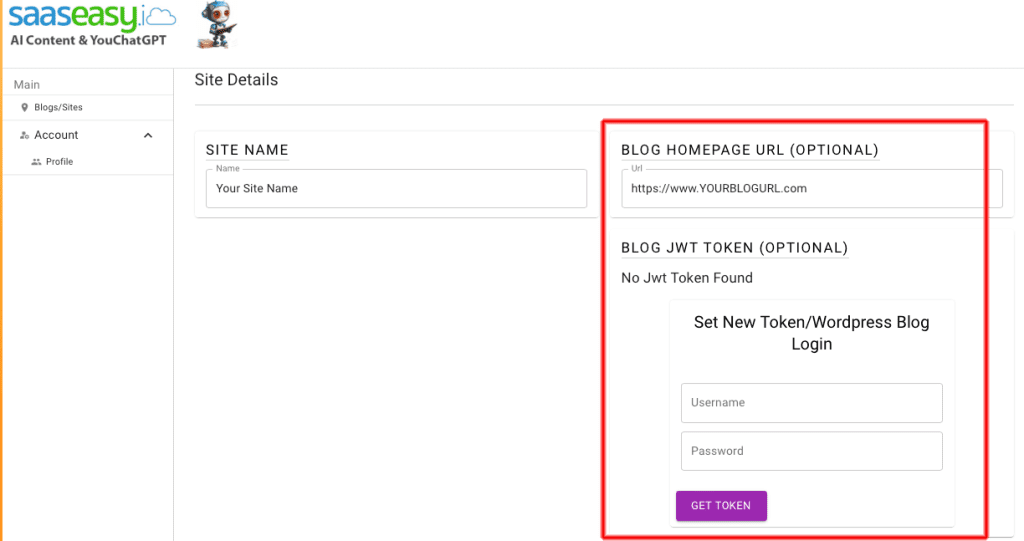
After you’ve installed the JWT Plugin, you can then configure your Blog details in SaasEasy AI Blogger on the Site Details page.
Enter the URL to your BLOG HOMEPAGE. This must be set to your BLOG HOMEPAGE or authentication won’t work.
Then you can enter your BLOG username/password and click GET TOKEN.
The access token will be stored in SaasEasy AI and you shouldn’t have to change/set it again until it expires.
**YOU CAN FOLLOW THE NEXT STEP TO INCREASE THE JWT TOKEN EXPIRATION LENGTH** or you will need to re-authenticate every 7 days (the default JWT token expiration length)
(Optional): Increase JWT Expiration Duration So You Don’t have to re-authenticate every 7 days.
NOTE: The JWT Authentication Token Expiration length change we’re about to make will only apply to newly created tokens, any tokens already created will have the default expiration length of 7 days.
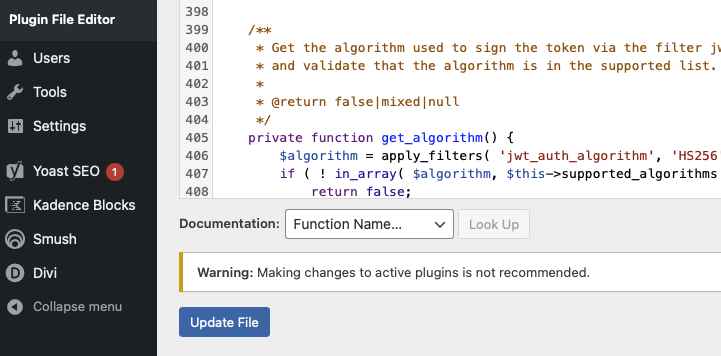
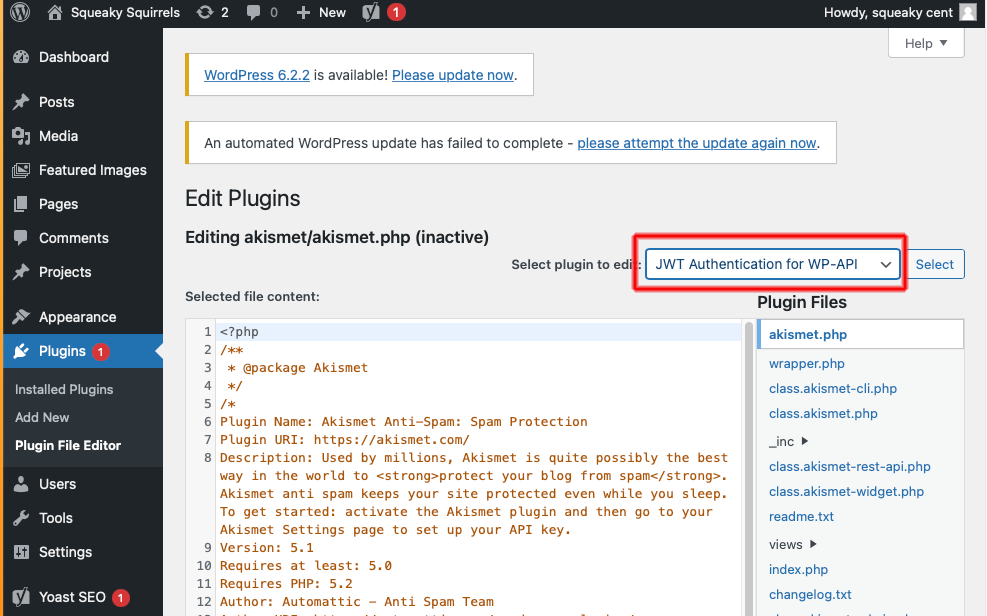
To increase the duration that the JWT Tokens are valid for, click on “Plugin File Editor” under the Plugins menu option.
Then select the “JWT Authentication for WP-API” option in the dropdown as shown below. AND CLICK THE SELECT BUTTON!
Then you will see a list of Plugin Files on the right hand side for the JWT Authentication Plugin (as shown below). Click to expand the “public” dropdown. Then Click on the file “class-jet-auth-public.php”. The, Scroll down in the file on the left hand side until you see
DAY_IN_SECONDS * 7Change the 7 to whatever number of days you want the JWT Tokens to be valid for, so you don’t have to re-authenticate in SaasEasy AI Blogger every 7 days.
Replace the number 7 with just another integer whole number. If you change it to 365 days it should look exactly like the text below. Very important that you don’t add anything else or you’ll break the code.
DAY_IN_SECONDS * 365 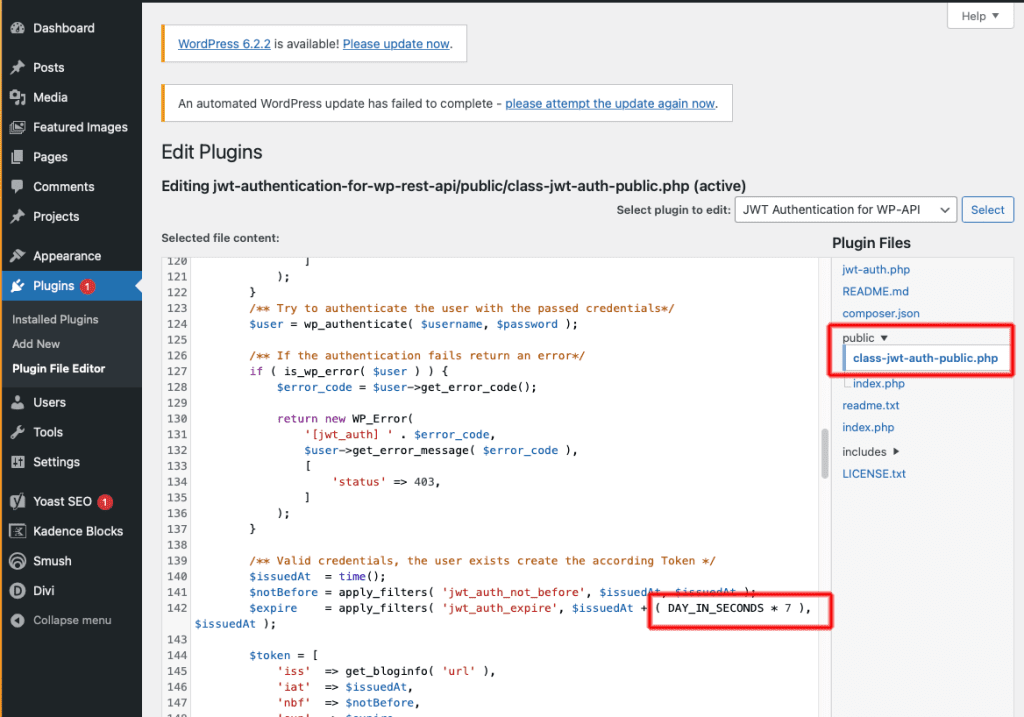
Then click the “Update File” button at the bottom and you’re done! Now, any newly created tokens will not expire for the length of days that you changed it to.